Facebook description: I’m regularly asked how to program a VESC for drive in robots, and since an increasing number of people are starting to use VESCs, I thought I’d put together a quick beginners guide on how to set it up. Not doing anything fancy here, but this setup should work fine for the majority of robots.
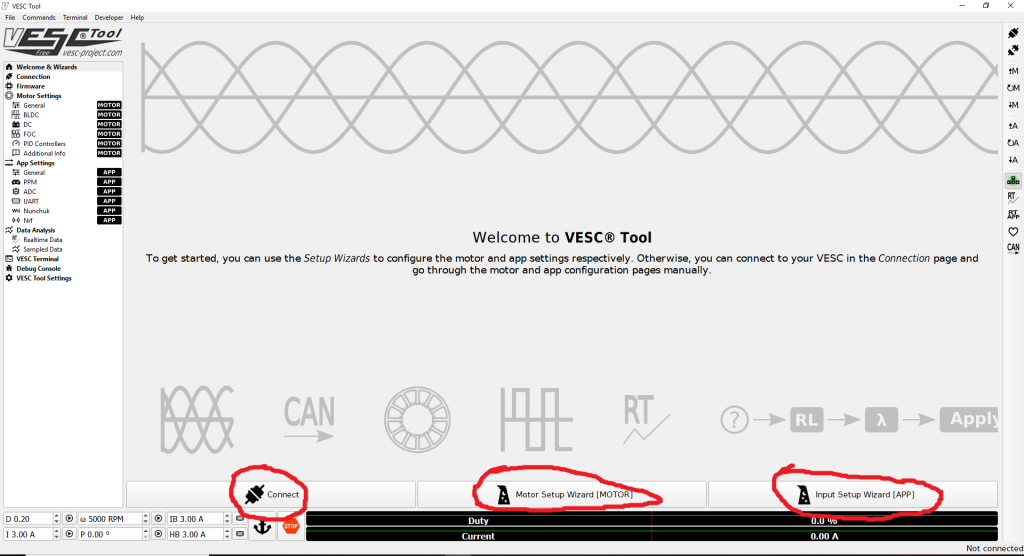
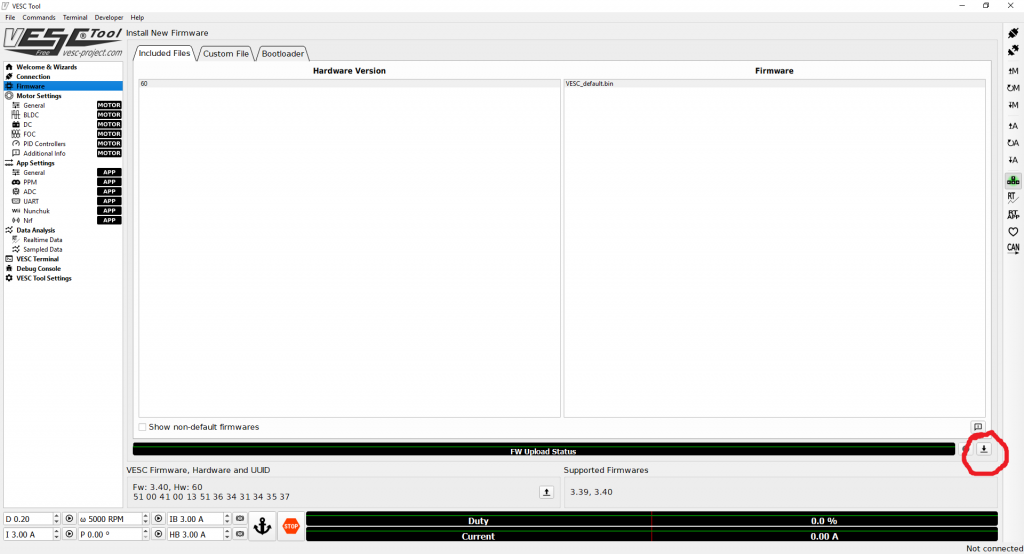
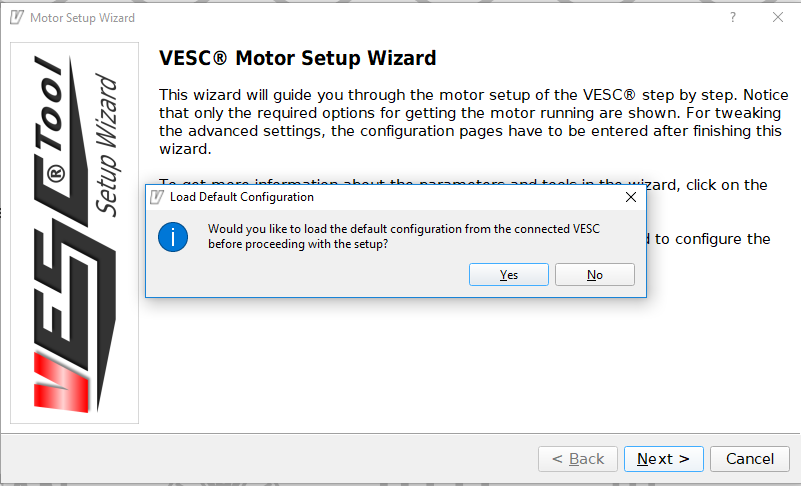
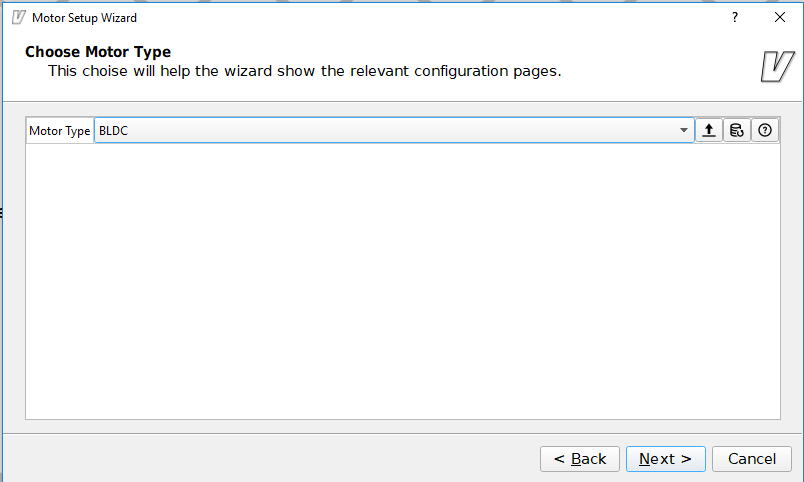
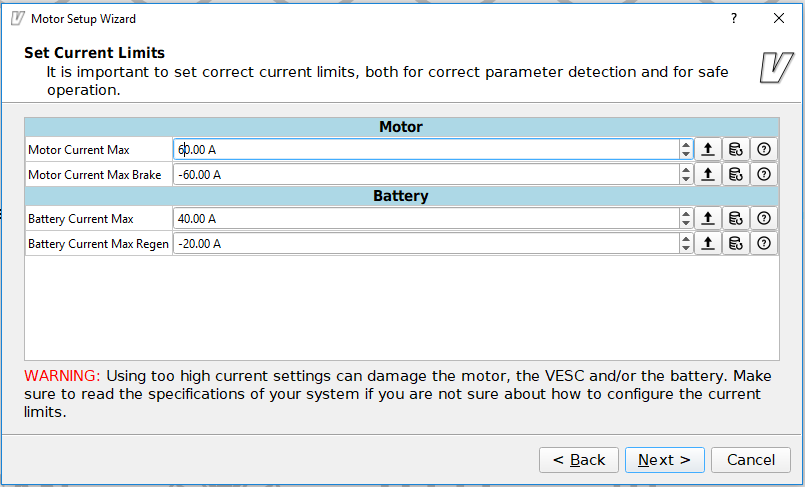
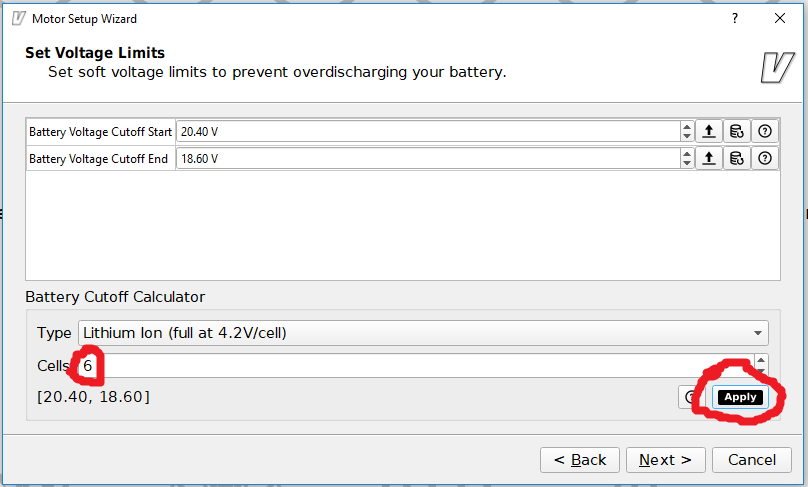
Once installed, connect the VESC to the motor, receiver, and batteries you want to use, and make sure the lights on the VESC are on, then connect the VESC to the computer via a USB cable. Once the VESC Tool is open, click the Connect button (Circled in red). First time you use it it will likely ask for a firmware upgrade, if not you can skip the next step. If it asks for a firmware upgrade, click the Firmware tab in the top left. The correct firmware for your VESC will already be selected, so just click the upload button in the bottom right (circled in red), and wait for it to upload. Once this has finished, go back to the Welcome and Wizards page and click connect again. Click on the Motor Setup Wizard button, and this window will appear. Select yes when it asks you to load default config, then click Next Select BLDC. FOC can also be used, but its a little more complicated and it tends to be better suited for skateboards than robots anyway… Next step is to set up the currents. These can be set to suit your robot, but on a regular VESC I wouldn’t advise going above 60A. Also best to keep Battery Current Max Regen down as this is how much it force feeds in to the battery under braking, which lipos don’t like. It can’t be zero though as the VESC doesn’t like it, so I tend to set it to about 20A.Setting up the voltage limit is optional but adviseable, especially during testing. Just select the number of cells you’re using at the bottom then click apply.
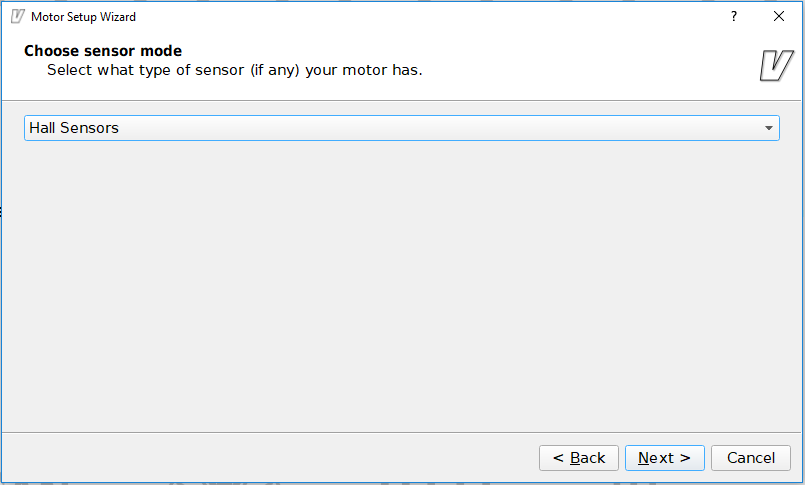
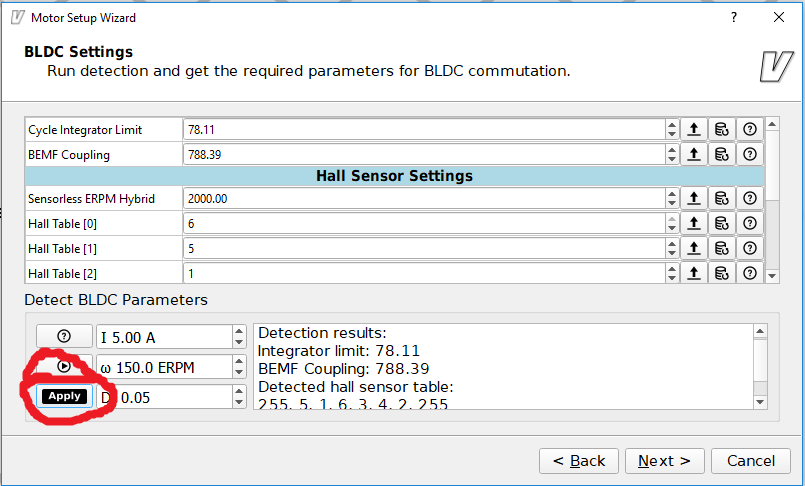
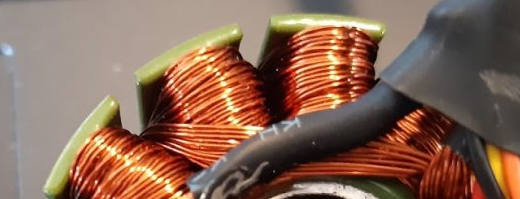
Select whether you’re using a sensored or sensorless motor. In this example I’m using a sensored motor, which tends to be the better option for smooth control.Make sure the motor is setup so it can spin freely under no load. This section calculates the motor properties by spinning up the motor. Press the ‘play’ button, and the motor will spin up. Info should appear in the table to the right. Once this appears, click Apply.
If it says detection failed, try adjusting the current, ERPM and duty cycle parameters slightly (to the right of the ‘play’ button) and try again.
Once you hit Next here, clear any pop ups about hall sensors and then you should be back to the main menu.Team Nuts – Robot Wars
· 13 December 2018 · Edited ·
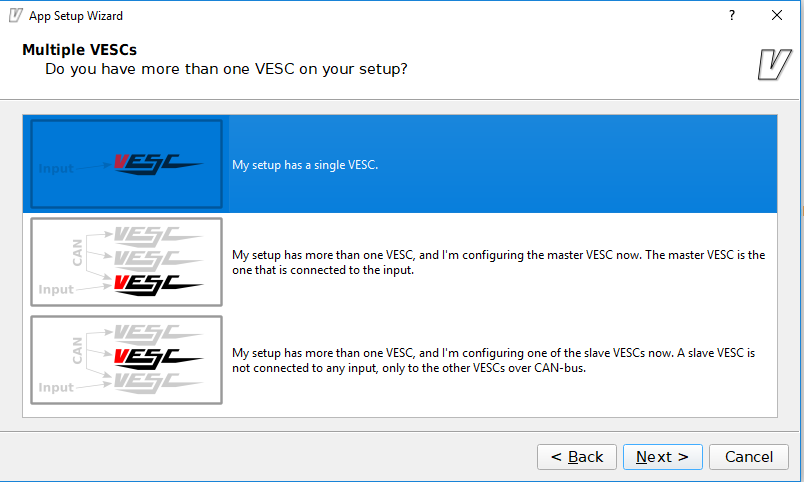
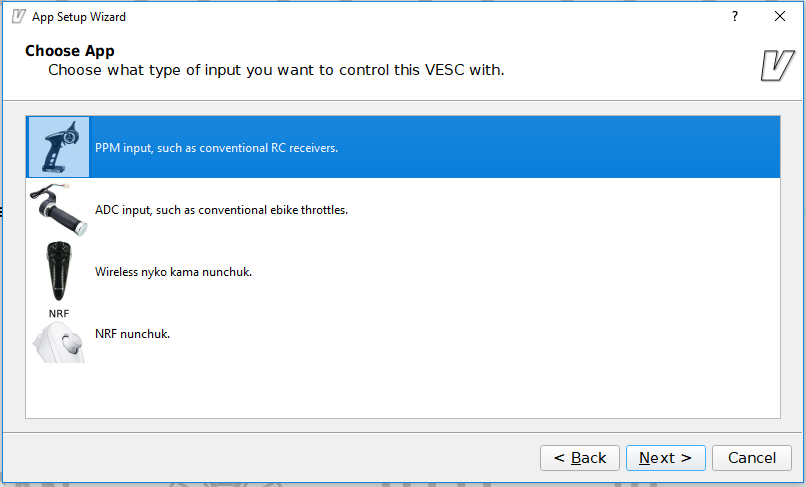
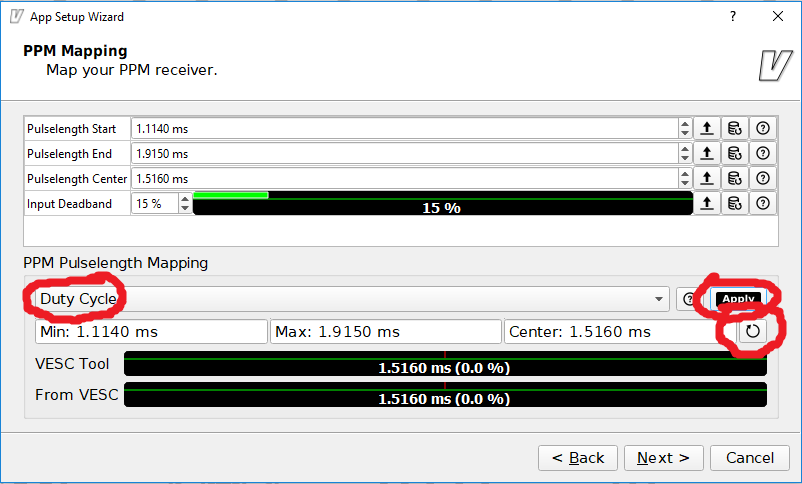
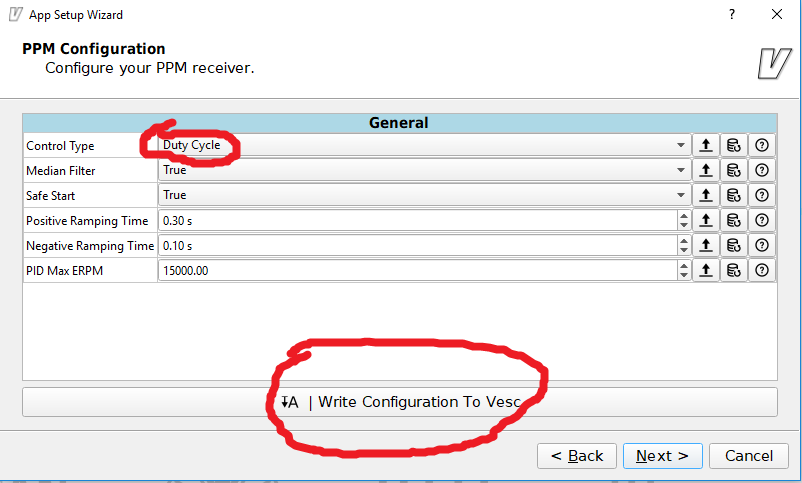
Press the ‘Input Setup Wizard’ on the main page and select load default config. Once thats done, the list above will appear. Assuming this is a 2wd robot with one motor a side, select ‘Single VESC’. For 4wd or 2 motors per wheel, you can either use CAN bus, which is configured using the other two buttons, or you can set each VESC up seperately and just use the same servo output from the RX with a Y lead.Select PPM input for Servo signalsTurn on your transmitter and make sure the RX is connected. Select Duty Cycle mode, click refresh in the bottom right, then move the stick up and down fully. The bars on the bottom right should move with the stick. Once you’ve done that, let the stick rest in the center, and click Apply.Set the Control type to Duty Cycle mode, then click ‘Write config to VESC’. After this you should be able to control the motor using your transmitter.